Coconut Snowball Truffles Recipe
Introduction
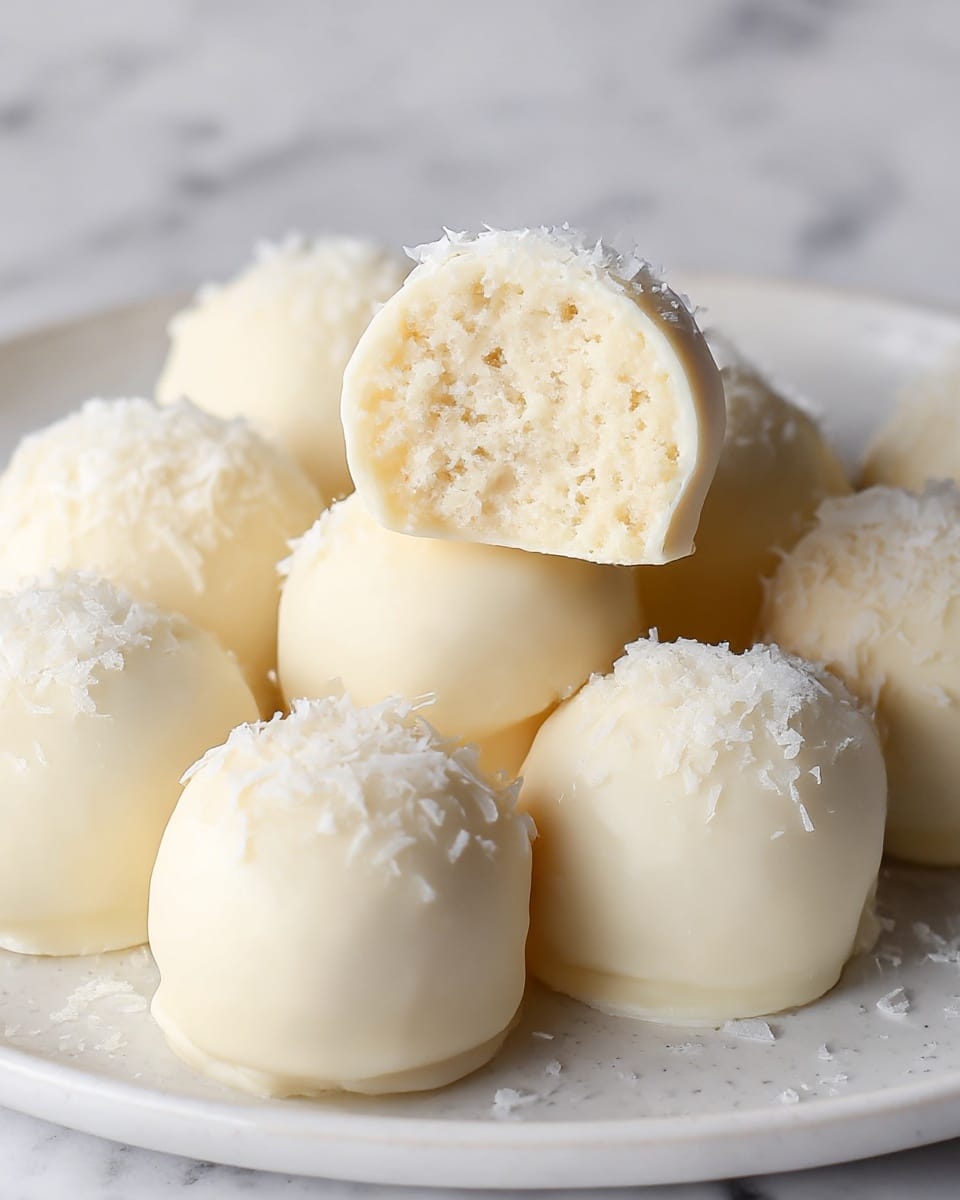
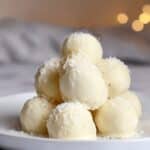
Coconut Snowball Truffles are a delightful treat combining the rich creaminess of condensed milk with the tropical flavor of coconut, all wrapped in a smooth white chocolate coating. These bite-sized sweets are perfect for sharing or enjoying as a special indulgence.

Ingredients
- 350 g desiccated coconut (~4½ cups), plus extra for topping
- 1 tin condensed milk (397 g or 14 oz)
- 400 g white chocolate (14 oz)
Instructions
- Step 1: Line a large tray with baking paper.
- Step 2: Place the desiccated coconut into a large bowl with the condensed milk. Mix until well combined.
- Step 3: Take about 1 heaped tablespoon of the mixture at a time and roll it into balls using your hands. If it gets too sticky, using slightly damp hands will help.
- Step 4: Place the balls onto your lined tray and freeze for 30 minutes to help them firm up.
- Step 5: Melt the white chocolate. Dip each ball into it to coat then pop them back onto your lined tray. Sprinkle some more coconut on top for decoration.
- Step 6: Place the truffles into the fridge for 1 hour until the chocolate coating has hardened then enjoy!
Tips & Variations
- Use dampened hands when rolling to prevent the mixture from sticking too much.
- Try adding a splash of vanilla extract or a pinch of salt to the coconut mixture for added flavor depth.
- For a different look, drizzle dark chocolate over the white chocolate coating instead of additional coconut.
- If you prefer a firmer texture, allow the truffles to chill longer before serving.
Storage
Store the truffles in an airtight container in the refrigerator for up to one week. For longer storage, freeze them for up to one month. When ready to eat, let frozen truffles thaw in the fridge for 15–20 minutes. Avoid storing at room temperature as the white chocolate coating can soften.
How to Serve
Serve this delicious recipe with your favorite sides.
FAQs
Can I use regular coconut instead of desiccated coconut?
Desiccated coconut works best due to its fine texture, which helps the truffles bind well. Regular shredded coconut might make the mixture too coarse and less cohesive.
What if I don’t have condensed milk?
Condensed milk is essential for sweetness and binding. You can try making your own by simmering milk and sugar until thickened, but store-bought condensed milk is recommended for the best results.
PrintCoconut Snowball Truffles Recipe
These Coconut Snowball Truffles are a delightful no-bake treat combining the tropical flavor of desiccated coconut with creamy condensed milk, all coated in a smooth layer of white chocolate. Perfect for parties or a sweet snack, these truffles are easy to make and sure to impress.
- Prep Time: 15 minutes
- Cook Time: 0 minutes
- Total Time: 1 hour 45 minutes
- Yield: Approximately 30 truffles 1x
- Category: Dessert
- Method: No-Cook
- Cuisine: International
- Diet: Vegetarian
Ingredients
Truffle Base
- 350 g desiccated coconut (~4½ cups), plus extra for topping
- 1 tin condensed milk (397g or 14oz)
Coating
- 400 g white chocolate (14oz)
Instructions
- Prepare the tray: Line a large tray with baking paper to prevent sticking and make it easier to place the truffles later.
- Mix coconut and condensed milk: In a large bowl, combine the desiccated coconut and condensed milk thoroughly until you get a sticky and well-combined mixture.
- Shape truffles: Using about 1 heaped tablespoon of the mixture at a time, roll it into balls with your hands. If the mixture becomes too sticky, moisten your hands slightly with water to make rolling easier.
- Freeze to firm up: Place the rolled coconut balls onto the lined tray and freeze them for 30 minutes. This will help them firm up for dipping.
- Melt the white chocolate: Gently melt the white chocolate until smooth, using a microwave or double boiler, ensuring it does not burn.
- Coat the truffles: Dip each coconut ball into the melted white chocolate to coat completely. Return the coated truffles to the lined tray.
- Add coconut topping: Sprinkle extra desiccated coconut on top of the chocolate-coated truffles for decoration.
- Chill to set: Place the truffles in the refrigerator for 1 hour, allowing the white chocolate coating to harden completely before serving.
- Enjoy: Once set, the Coconut Snowball Truffles are ready to be enjoyed as a sweet, indulgent treat.
Notes
- Use slightly damp hands to prevent the coconut mixture from sticking when rolling into balls.
- Freezing the truffles before dipping helps the coating adhere better and prevents them from falling apart.
- Ensure the white chocolate is melted gently to avoid burning and a grainy texture.
- Store the truffles in an airtight container in the refrigerator for up to one week.
- For a festive touch, you can sprinkle colored coconut flakes or edible glitter instead of plain coconut.
Keywords: coconut truffles, no bake dessert, white chocolate truffles, coconut balls, easy sweets