Red Velvet Marble Waffles Recipe
If you’re searching for a way to make breakfast absolutely unforgettable, Red Velvet Marble Waffles are a delicious and playful answer. Imagine the best of both worlds: a classic golden waffle intertwined with the luscious decadence of red velvet, creating a visually stunning and flavorful treat. Whether you’re cooking up a weekend brunch or adding a festive flair to a special occasion, these waffles promise to delight both your eyes and your taste buds. Plus, marbling the two batters together is easier than you think and just plain fun!
Ingredients You’ll Need
You’d be surprised at how simple the ingredient list for these Red Velvet Marble Waffles is, relying on kitchen staples with a few clever touches. Each ingredient has a role to play, from building that signature waffle texture to ensuring the red velvet swirl is as vibrant and chocolatey as you crave.
- All-Purpose Flour: Gives structure to both batters and ensures the waffles hold together beautifully.
- Sugar: Sweetens and helps crisp up each edge, creating a classic golden finish.
- Baking Powder & Baking Soda: These leaveners ensure your waffles cook up fluffy and tender inside.
- Salt: A little goes a long way in balancing sweetness and deepening flavor.
- Buttermilk: Adds tang and extra tenderness for truly soft waffles that stay moist.
- Eggs: Essential for binding the batter and adding richness to both flavors.
- Melted Butter: Infuses every bite with buttery goodness and helps create those crisp exteriors.
- Vanilla Extract: Enhances both the classic and red velvet batters with warmth and aroma.
- Cocoa Powder (for red velvet): Gives the signature chocolate note that sets red velvet apart.
- Red Food Coloring: Makes the red velvet swirls pop visually—choose gel for vibrant color without thinning your batter.
How to Make Red Velvet Marble Waffles
Step 1: Mix Your Classic Waffle Batter
Begin by combining the dry and wet ingredients for your classic batter separately. Whisk the flour, sugar, baking powder, baking soda, and salt in one bowl. In another, blend the buttermilk, eggs, melted butter, and vanilla extract. Gently fold the wet into the dry just until you don’t see any streaks of flour. Resist the urge to overmix—a few lumps are perfect, and they ensure your waffles will be light and fluffy.
Step 2: Prepare the Red Velvet Batter
In a fresh bowl, whisk together the flour, cocoa powder, sugar, baking powder, baking soda, and salt for your red velvet base. Separately, mix the buttermilk, egg, melted butter, vanilla, and that bold red food coloring. Merge the wet into the dry and give it a gentle stir—again, just until combined. The result should be a rich, chocolatey batter streaked gorgeously red.
Step 3: Preheat Your Waffle Iron
Follow your waffle maker’s directions for preheating—it’s crucial for getting that crisp exterior. A hot iron prevents sticking and helps set those beautiful marble swirls within seconds of hitting the grates.
Step 4: Create the Marbled Effect
Lightly grease your waffle iron, and now for the fun part! Scoop a bit of classic batter onto the iron, then immediately add a scoop of red velvet. Use a toothpick or butter knife to swirl them together—don’t overdo it, or you’ll lose that marbled magic. Each waffle will look unique, almost too pretty to eat (almost).
Step 5: Cook and Finish
Close the iron and cook your Red Velvet Marble Waffles until golden brown and just crisp around the edges. The marbled swirls should peek through beautifully. Remove each waffle carefully, and repeat until both batters are used up, regreasing the iron if needed.
How to Serve Red Velvet Marble Waffles
Garnishes
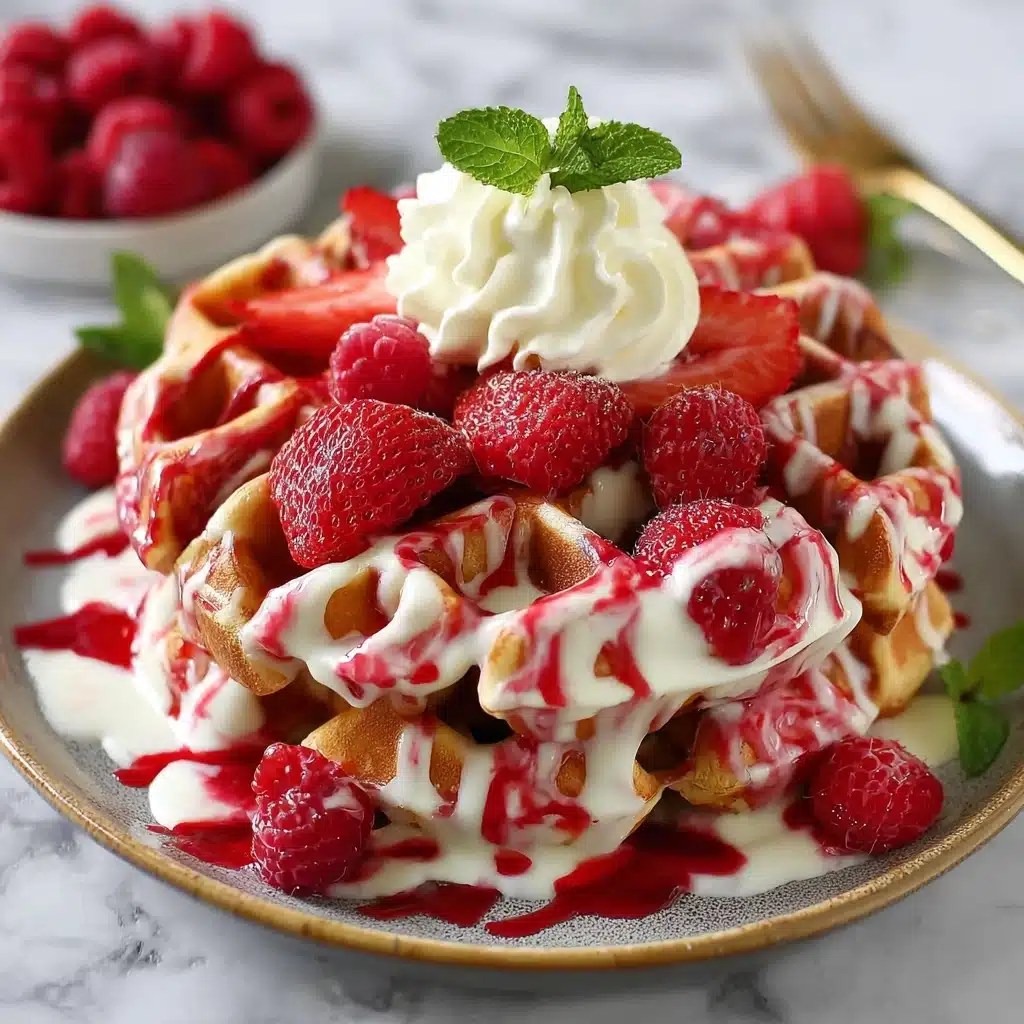
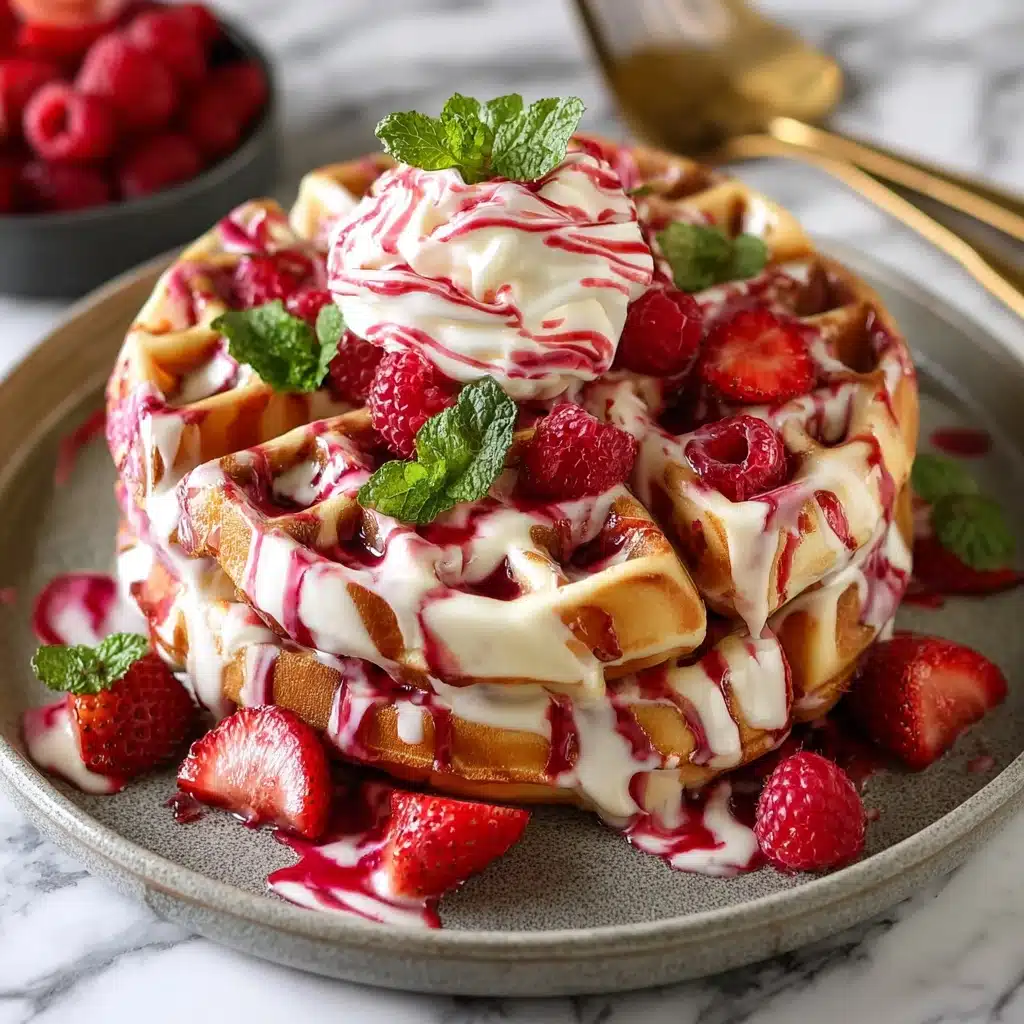
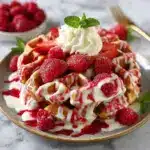
Top your waffles with a generous dollop of whipped cream or a dusting of powdered sugar for a classic finish. Fresh berries—like strawberries, raspberries, or blueberries—add juicy brightness and a pop of color, while chocolate chips or chocolate sauce make things extra indulgent. Even a drizzle of cream cheese glaze feels right at home on these beauties.
Side Dishes
Pair Red Velvet Marble Waffles with crisp bacon, savory sausage, or fluffy scrambled eggs to balance sweetness with a little savory. For a lighter touch, serve with a fresh fruit salad or Greek yogurt on the side—it’s a fantastic way to round out the meal and keep things feeling special without a ton of extra work.
Creative Ways to Present
Red Velvet Marble Waffles are the star of the show: stack them high and scatter them with berries for a brunch centerpiece, or cut waffles into quarters and layer in a sundae glass with whipped cream and fruit for a dazzling parfait. For parties or holidays, use cookie cutters to punch out fun shapes, turning each plate into edible art.
Make Ahead and Storage
Storing Leftovers
Once cooled, place any leftover waffles in an airtight container or zip-top bag, keeping them separated with parchment paper. They’ll stay fresh in the refrigerator for up to three days, making them a fabulous grab-and-go breakfast or late-night snack.
Freezing
Extra Red Velvet Marble Waffles freeze beautifully! Arrange cooled waffles in a single layer on a baking sheet, freeze until solid, then transfer to a freezer-safe bag. They’ll keep their texture and flavor for up to two months, so don’t worry about making too many.
Reheating
For the crispiest results, pop waffles straight from the fridge or freezer into your toaster or toaster oven until warmed through and crisped up. Avoid the microwave if you can—it’ll make them softer. A few minutes in a 350°F oven also works wonders for reheating several waffles at once.
FAQs
Can I make Red Velvet Marble Waffles without food coloring?
Absolutely! You can skip the food coloring—the chocolate and vanilla contrast will still create a pretty marbled pattern, just not as vividly red. Beetroot powder is an all-natural alternative if you’re looking for that signature hue without artificial color.
Do I need two separate bowls for the batters?
Yes, keeping the batters separate is what lets you swirl and marble them later. It’s just a few extra dishes, but the beautiful, distinct colors and flavors are worth every bit of it!
How do I prevent my waffles from sticking?
A well-preheated and greased waffle iron is key. Even nonstick models benefit from a light spritz or brush of oil or melted butter between batches to keep things moving and your marble pattern intact.
Can I double this recipe for a crowd?
Definitely! Both batters can be easily doubled—just use larger bowls and mix in batches if needed. Red Velvet Marble Waffles are always a showstopper at brunch parties and family gatherings, so don’t be surprised if they disappear quickly.
What toppings go best with Red Velvet Marble Waffles?
You can’t go wrong with a classic drizzle of maple syrup, but some favorites include fresh berries, whipped cream, or a quick homemade cream cheese glaze. For even more decadence, try a scoop of vanilla ice cream and a handful of chocolate chips.
Final Thoughts
These Red Velvet Marble Waffles are the kind of breakfast treat that makes any day feel extra special. Whether you’re serving them for brunch with friends or surprising your family on a regular morning, their beautiful marbled swirls and incredible flavor always make people smile. Give them a try and see just how easy it is to make breakfast unforgettable!
PrintRed Velvet Marble Waffles Recipe
These Red Velvet Marble Waffles are a delightful twist on classic waffles, combining the rich flavors of red velvet with the traditional fluffy texture of a waffle. Perfect for a special breakfast or brunch treat!
- Prep Time: 15 minutes
- Cook Time: 20 minutes
- Total Time: 35 minutes
- Yield: 4 servings 1x
- Category: Breakfast/Brunch
- Method: Waffle Iron
- Cuisine: American
- Diet: Vegetarian
Ingredients
For the Classic Waffle Batter:
- 1 1/2 cups all-purpose flour
- 1 tablespoon sugar
- 1 teaspoon baking powder
- 1/2 teaspoon baking soda
- 1/4 teaspoon salt
- 1 cup buttermilk
- 2 large eggs
- 1/4 cup melted butter
- 1 teaspoon vanilla extract
For the Red Velvet Batter:
- 1 cup all-purpose flour
- 2 tablespoons cocoa powder
- 1/4 cup sugar
- 1 teaspoon baking powder
- 1/2 teaspoon baking soda
- 1/4 teaspoon salt
- 3/4 cup buttermilk
- 1 large egg
- 1/4 cup melted butter
- 1 teaspoon vanilla extract
- 1 tablespoon red food coloring
Instructions
- Prepare the Classic Waffle Batter: In a mixing bowl, whisk together the flour, sugar, baking powder, baking soda, and salt. In another bowl, whisk together the buttermilk, eggs, melted butter, and vanilla extract. Pour the wet ingredients into the dry ingredients and mix until just combined. Do not overmix.
- Prepare the Red Velvet Batter: In a separate mixing bowl, whisk together the flour, cocoa powder, sugar, baking powder, baking soda, and salt. In another bowl, whisk together the buttermilk, egg, melted butter, vanilla extract, and red food coloring. Pour the wet ingredients into the dry ingredients and mix until just combined. Do not overmix.
- Preheat the Waffle Iron: Preheat your waffle iron according to the manufacturer’s instructions.
- Create the Marbled Effect: Lightly grease the waffle iron. Pour a small amount of classic waffle batter onto the waffle iron, followed by a small amount of red velvet batter. Use a toothpick or a knife to gently swirl the batters together to create a marbled effect.
- Cook the Waffles: Close the waffle iron and cook according to the manufacturer’s instructions until the waffles are golden brown and cooked through.
- Serve: Serve the waffles warm with your favorite toppings such as whipped cream, fresh berries, or maple syrup.
Nutrition
- Serving Size: 1 waffle
- Calories: 320
- Sugar: 11g
- Sodium: 480mg
- Fat: 14g
- Saturated Fat: 8g
- Unsaturated Fat: 5g
- Trans Fat: 0g
- Carbohydrates: 42g
- Fiber: 2g
- Protein: 8g
- Cholesterol: 95mg
Keywords: Red Velvet, Waffles, Breakfast, Brunch, Marbled Waffles