Homemade Hot Dog Buns Recipe
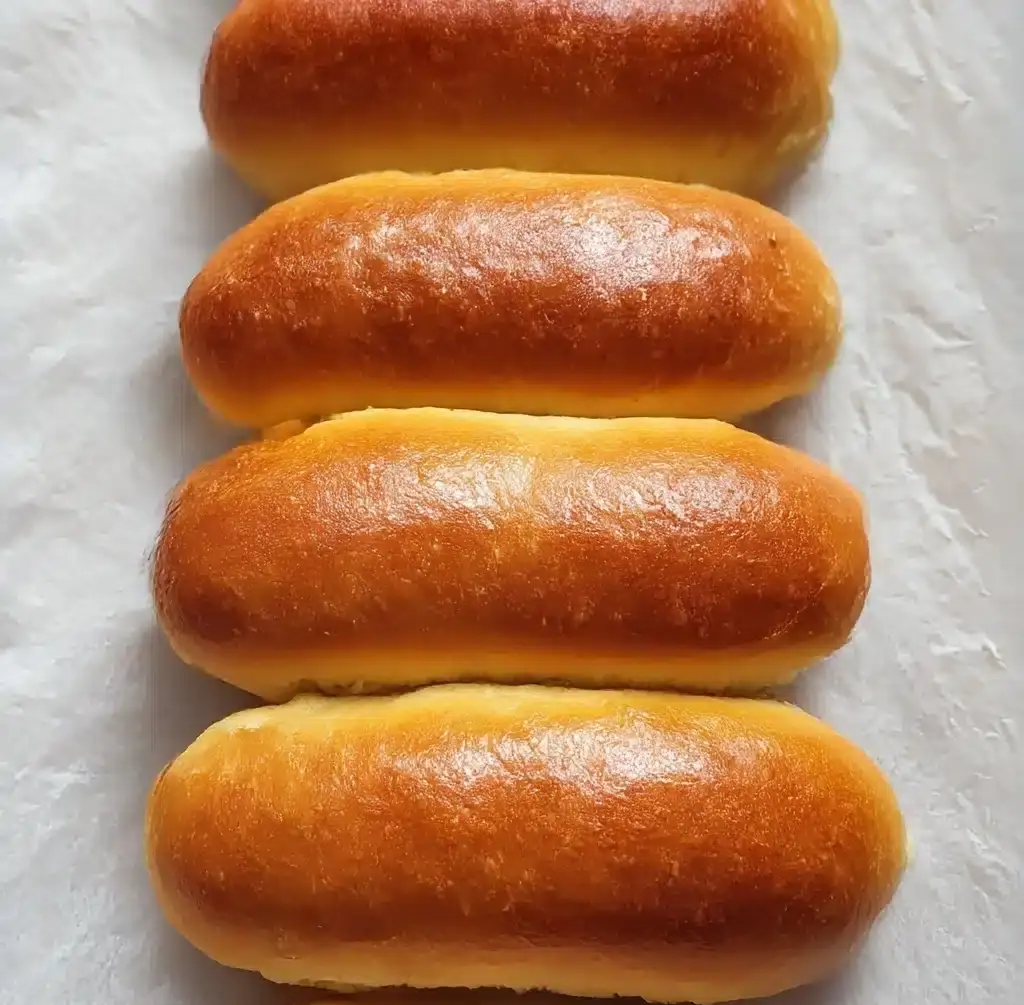
If you’ve ever bitten into a hot dog and thought, “This bun could be so much better,” then you’re about to discover your new favorite kitchen hack: Homemade Hot Dog Buns. These buns are soft, slightly sweet, and pillowy, yet sturdy enough to hold your favorite toppings without falling apart. The difference fresh, homemade buns make is truly night and day compared to store-bought versions. Plus, baking them yourself lets you customize size, texture, and even add your own special touches. Trust me, once you try making these, your grill outs and game days will never be the same.
Ingredients You’ll Need
It’s amazing how just a handful of simple ingredients can come together to create perfect Homemade Hot Dog Buns. Each ingredient plays its part—flour provides structure, yeast brings the rise and fluffiness, while milk and eggs enrich the dough with softness and tenderness. Pay attention to these basics because they set the foundation for that irresistible bun texture.
- 2 ½ cups all-purpose flour: This is the base of your dough; reserve about ¼ cup extra for adjusting the texture during kneading.
- 2 teaspoons instant yeast: Provides the lift to make your buns fluffy and airy; you can also use active dry yeast but adjust liquid temperature accordingly.
- 2 tablespoons sugar: Adds a hint of sweetness and helps feed the yeast for a better rise.
- 1 teaspoon salt: Balances flavor and strengthens dough structure.
- 1 cup warm milk: Use whole or reduced-fat milk warmed just right to activate the yeast without killing it.
- 2 tablespoons vegetable oil: Keeps the buns moist and tender。
- 1 large egg: Enriches the dough and gives it a beautiful golden color.
- 1 beaten egg for egg wash: Creates a shiny, golden crust once baked.
How to Make Homemade Hot Dog Buns
Step 1: Mix the Dry Ingredients
Start by combining the flour, yeast, sugar, and salt in a large bowl. Mixing these dry ingredients evenly ensures your buns have consistent flavor and texture throughout. Plus, it’s the first step in building the dough’s structure.
Step 2: Add the Wet Ingredients
Next, pour in the warm milk, vegetable oil, and one beaten egg. Mix it all together vigorously – you can use a stand mixer or just your hands. This step transforms your dry ingredients into a sticky batter that’s ready to become dough.
Step 3: Form the Dough
Gradually sprinkle in extra flour about a tablespoon at a time while you mix, until the dough starts pulling away from the sides and forms a soft, shaggy ball. This balance is key: too much flour, and the buns will be dry; too little, and they’ll be too sticky to handle.
Step 4: Knead the Dough
Turn your dough onto a floured surface for kneading. Work it by hand for about 5 minutes or around 50 passes, or use your mixer’s dough hook for 3 minutes. Proper kneading activates gluten, giving your buns that perfect chewy texture and smooth finish.
Step 5: Let the Dough Rest
Cover the dough and allow it to rest for 10 minutes. This short break helps relax the gluten strands, making the dough easier to shape – a little downtime that pays off big time in your final bun form.
Step 6: Shape the Buns
Divide the rested dough into 8 equal pieces. Flatten each into a neat 4-by-6-inch rectangle, then roll tightly from the long edge to form that iconic hot dog bun shape. Be sure to tuck in the ends for a tidy finish that holds up during grilling or serving.
Step 7: Let the Buns Rise
Place the shaped buns seam-side down on a baking sheet lined with parchment paper. Cover with a kitchen towel and let them rise in a cozy, draft-free spot for about 30 minutes until they puff up and almost double in size. This proves the dough and ensures fluffiness.
Step 8: Apply Egg Wash and Bake
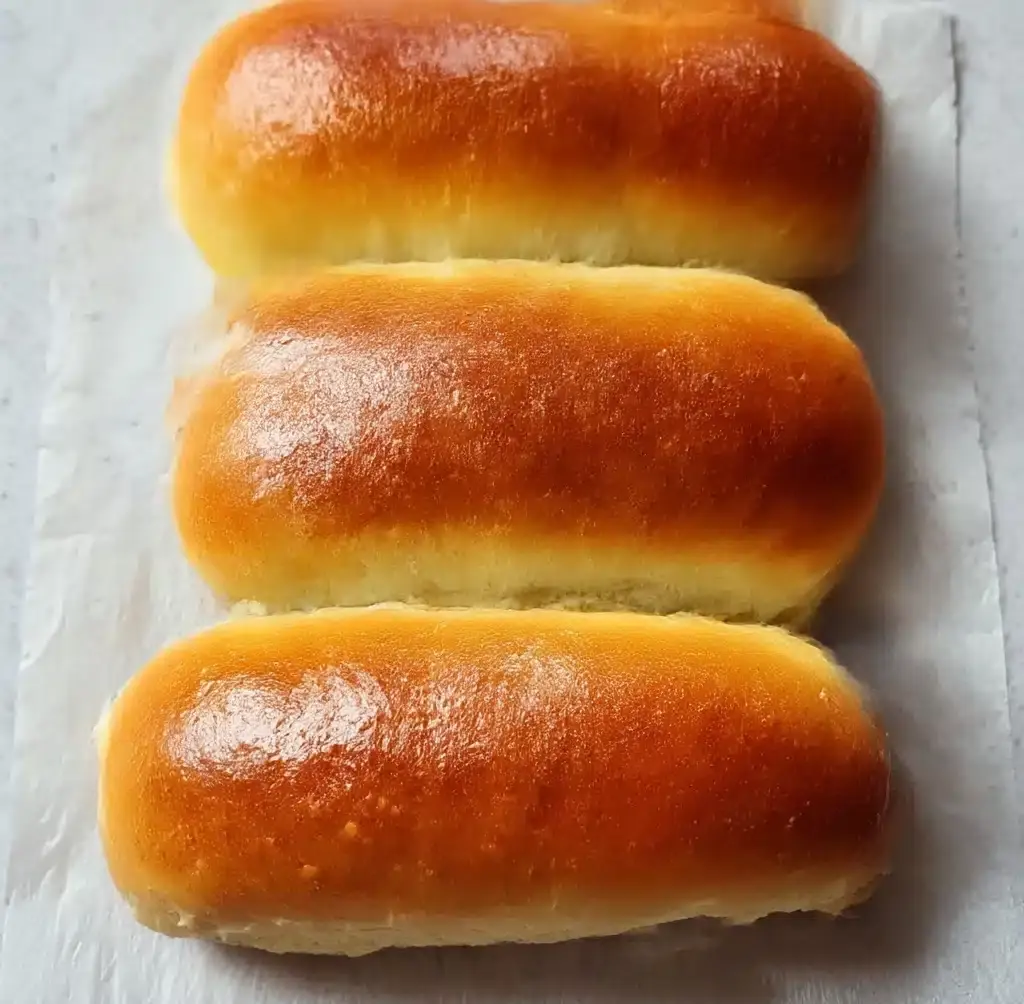
Preheat your oven to 375°F. Brush each bun with a beaten egg wash to achieve that gorgeous, glossy golden crust. Bake for 12 minutes or until the buns are brownish-golden on top and sound hollow when tapped – that’s your cue that they’re perfectly baked inside.
Step 9: Cool Before Serving
Once out of the oven, transfer buns to a wire rack and let them cool for at least 10 minutes. Cooling helps the structure set so your buns slice and hold toppings without getting squished.
How to Serve Homemade Hot Dog Buns
Garnishes
These buns are the perfect blank canvas for endless topping possibilities. Think classic: mustard, ketchup, relish, onions, and sauerkraut. Or get adventurous with spicy jalapeños, melted cheese, creamy coleslaw, or even a drizzle of tangy barbecue sauce. Fresh herbs like chopped cilantro or chives add a fresh pop, making every bite exciting.
Side Dishes
No hot dog meal feels complete without the perfect sides. Crispy French fries, tangy pickles, crunchy potato salad, or a refreshing cucumber salad complement the soft buns beautifully. If you want a crowd-pleaser, baked beans or corn on the cob can bring that rich, comforting vibe to the table.
Creative Ways to Present
You can elevate your Homemade Hot Dog Buns beyond the typical backyard cookout by slicing them into mini sliders or stuffing with gourmet fillings like bratwurst with sauerkraut or spicy chorizo with avocado. Toasted with garlic butter for a subtle richness, or topped with sesame seeds before baking for extra texture, these buns can handle it all.
Make Ahead and Storage
Storing Leftovers
Once cooled completely, store your Homemade Hot Dog Buns in an airtight container or zip-top bag at room temperature. They’ll stay soft and fresh for 2 to 3 days—perfect if you want to make a batch ahead for the week.
Freezing
If you want to save these buns for longer, freezing is the way to go. Wrap each bun individually in plastic wrap and then place in a freezer-safe bag. They keep well for up to 3 months without losing that fresh-baked charm.
Reheating
Reheat frozen or leftover buns by wrapping them in foil and warming in a 350°F oven for 10 to 15 minutes, or simply pop them in a toaster oven for a crisp edge. For quick reheating, a brief microwave zap wrapped in a damp paper towel keeps buns soft and ready to enjoy.
FAQs
Can I use active dry yeast instead of instant yeast?
Absolutely! If using active dry yeast, warm your milk to slightly cooler temperatures, around 110–120°F, and let the yeast activate for about 5 minutes in the milk before mixing with other ingredients. This helps ensure a good rise.
What can I substitute for vegetable oil?
Light olive oil, canola oil, or even melted butter can be used in place of vegetable oil. Each substitute will add a slightly different flavor but will still produce tender buns.
Can I make these buns gluten-free?
While this recipe relies on gluten for its structure, you could experiment with specialty gluten-free flour blends designed for bread. Keep in mind it may require additional binding agents like xanthan gum and some trial and error to get the texture just right.
How do I know when the buns are fully baked?
Look for a shiny golden brown top and gently tap the buns—if they sound hollow, they’re done. You can also use an instant thermometer; the internal temperature should be around 190°F.
Can I add flavors or seeds to the dough?
Definitely! Adding herbs, garlic powder, poppy seeds, or sesame seeds before baking can add wonderful flavor and texture twists that personalize your Homemade Hot Dog Buns to your taste.
Final Thoughts
Making your own Homemade Hot Dog Buns might sound like a project, but it’s genuinely so rewarding and surprisingly easy. The taste, texture, and freshness can turn any ordinary hot dog into a memorable meal. Once you try these buns, I promise your next cookout will feel extra special, and you’ll never reach for those store-bought packages again. Give it a go and enjoy every fluffy, golden bite!
PrintHomemade Hot Dog Buns Recipe

This Homemade Hot Dog Buns recipe provides soft, fluffy, and perfectly shaped buns ideal for hot dogs or any sandwich. Made with simple pantry ingredients like all-purpose flour, yeast, and milk, these buns feature a tender crumb and golden crust achieved through an egg wash and proper rising techniques.
- Prep Time: 15 minutes
- Cook Time: 12 minutes
- Total Time: 1 hour 17 minutes
- Yield: 8 hot dog buns 1x
- Category: Bread, Sandwich
- Method: Baking
- Cuisine: American
- Diet: Halal
Ingredients
Dry Ingredients
- 2 ½ cups all-purpose flour (plus about ¼ cup extra as needed)
- 2 teaspoons instant yeast (or 1 packet / 7g)
- 2 tablespoons sugar
- 1 teaspoon salt
Wet Ingredients
- 1 cup milk (whole or reduced-fat), heated to 120–130°F for instant yeast or 110–120°F for active dry yeast
- 2 tablespoons vegetable oil
- 1 large egg
- 1 beaten egg for egg wash
Instructions
- Mix the Dry Ingredients: In a large mixing bowl, combine the all-purpose flour, instant yeast, sugar, and salt, stirring well to distribute everything evenly.
- Add the Wet Ingredients: Pour in the warm milk, followed by the vegetable oil and a beaten egg. Mix vigorously by hand or with a stand mixer for about 2 minutes until a sticky batter forms.
- Form the Dough: Add about ¼ cup of additional flour gradually until the dough begins to form a soft, shaggy mass that pulls away from the sides of the bowl.
- Knead the Dough: Transfer the dough to a floured surface and knead by hand for about 5 minutes or 50 turns, or until smooth and elastic. If using a stand mixer with a dough hook, knead for about 3 minutes.
- Rest the Dough: Cover the dough and let it rest for 10 minutes. This short resting period relaxes the gluten, making the dough easier to shape.
- Shape the Buns: Divide the dough into 8 equal pieces. Flatten each into a 4-by-6-inch rectangle. Roll tightly from the long side into a log shape and tuck in the ends to form a classic hot dog bun shape.
- Let the Buns Rise: Place the buns seam-side down on a parchment-lined baking sheet. Cover with a clean kitchen towel and let them rise in a warm, draft-free area for 30 minutes, or until doubled in size.
- Apply Egg Wash and Bake: Preheat the oven to 375°F. Brush each bun gently with beaten egg for a shiny golden crust. Bake for 12 minutes or until the tops are golden brown and the buns sound hollow when tapped.
- Cool Before Serving: Allow the buns to cool on a wire rack for at least 10 minutes before slicing or serving. This helps set the structure and prevents squishing.
Notes
- Use warm milk within the temperature ranges specified to ensure proper yeast activation.
- You can substitute instant yeast with active dry yeast by adjusting liquid temperature and proofing time.
- Egg wash gives the buns a shiny, golden crust but can be omitted for an egg-free finish, though texture and appearance will vary.
- Kneading by hand should develop gluten enough to create a soft yet elastic dough; avoid over-flouring during shaping.
- Allow buns to cool completely before slicing to prevent them from becoming gummy or squashed.
- These buns can be stored in an airtight container at room temperature for up to 2 days or frozen for up to 1 month.
Nutrition
- Serving Size: 1 bun (approx. 60g)
- Calories: 150
- Sugar: 3g
- Sodium: 160mg
- Fat: 3g
- Saturated Fat: 0.5g
- Unsaturated Fat: 2.5g
- Trans Fat: 0g
- Carbohydrates: 27g
- Fiber: 1g
- Protein: 5g
- Cholesterol: 30mg
Keywords: homemade hot dog buns, soft hot dog buns, bread recipe, sandwich buns, yeast bread