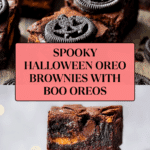
Halloween Oreo Cookie Boo Brownies Recipe
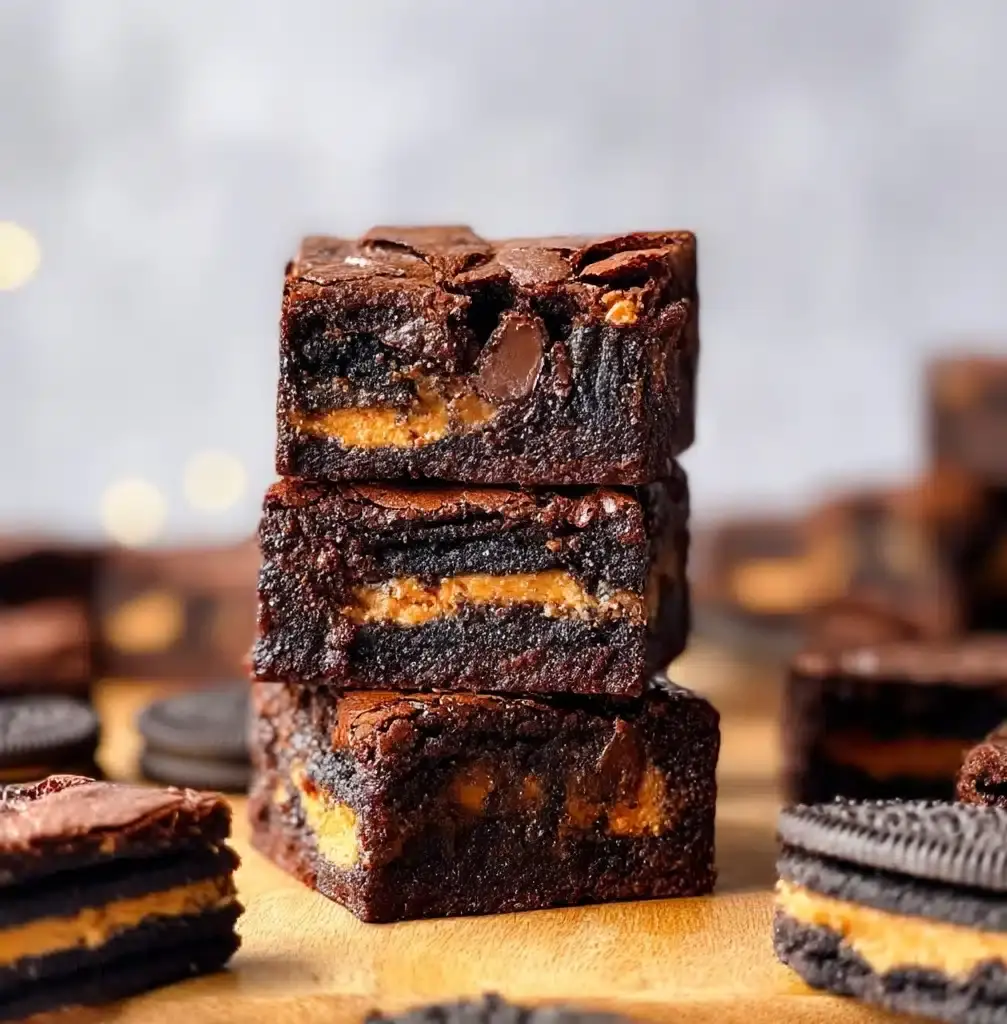
If you’re on the hunt for a festive, fun, and absolutely delicious treat to wow your family and friends this spooky season, look no further than these Halloween Oreo Cookie Boo Brownies. Combining the fudgy richness of homemade brownies with the eerie charm of Halloween-themed Oreo cookies perched on top, this dessert brings both comfort and playfulness to your dessert table. Each bite delivers a delightful mix of chewy brownie goodness paired with crunchy, creepy Oreos that make this a standout dish you simply must try.

Ingredients You’ll Need
These ingredients are straightforward but essential to nailing the perfect balance of rich flavor and spooky fun in your Halloween Oreo Cookie Boo Brownies. Each component plays a key role in creating the ideal fudgy texture and that playful Oreo surprise on top.
- Oreo Brownies batter: Following Baker by Nature’s classic recipe ensures your brownies are perfectly fudgy and chocolatey, the ultimate base for this dessert.
- Halloween Boo Oreos: These specially designed Oreos add a fun seasonal twist with their festive spooky designs, making the brownies visually festive and tasty.
- Parchment paper: Essential for lining your pan to make sure your brownies release easily and slice beautifully.
- Large chef’s knife: A sharp, sizable knife helps you cut through the brownies neatly, preserving those adorable Oreo designs on top.
How to Make Halloween Oreo Cookie Boo Brownies
Step 1: Prepare Your Pan and Batter
Start by lining a metal pan with parchment paper — this keeps the brownies from sticking and helps with easier slicing later on. Next, make the Oreo Brownie batter using your favorite Baker by Nature recipe. This batter is thick, fudgy, and the perfect backdrop for the Oreo toppings.
Step 2: Pour and Smooth the Batter
Once your batter is ready, pour it into the parchment-lined pan and smooth out the surface with a spatula. This creates an even layer that will bake consistently and give each brownie bar the perfect texture.
Step 3: Arrange the Halloween Boo Oreos
Now comes the fun part — placing the Halloween Boo Oreos on top! Arrange the cookies spaced evenly, with most of their spooky designs facing up for maximum visual impact. Don’t be afraid to leave a few Oreos whole and some broken into bigger pieces; it adds a playful texture contrast.
Step 4: Bake and Cool Completely
Bake your brownies until the edges are just set and the top has that shiny, slightly cracked appearance — perfect signs that you haven’t overbaked. Once out of the oven, let the brownies cool fully in the pan before moving on to slicing. Proper cooling is key to keeping those Oreo decorations intact and ensuring clean slices.
Step 5: Slice with Care
Use your large chef’s knife for slicing — press down firmly and then lift the knife straight up instead of dragging it through the brownie. Wiping the knife clean between cuts prevents crumb buildup and results in smooth edges that show off the Oreos beautifully. For an especially delicious twist, try enjoying these brownies chilled to enhance the chewy texture and make the chocolate chips and Oreo crunch pop.
How to Serve Halloween Oreo Cookie Boo Brownies
Garnishes
Enhance the spooky vibe by dusting a little cocoa powder or powdered sugar around the edges of your serving tray. Adding edible Halloween-themed sprinkles or mini candy pumpkins around the brownies ups the festive factor and invites your guests to dig into the fun.
Side Dishes
These brownies shine on their own but pair wonderfully with a scoop of vanilla bean ice cream or a glass of cold milk — the coolness balances the rich chocolate flavors perfectly. For an adult twist, a cup of spiced pumpkin latte or a hot cocoa with a hint of cinnamon complements the seasonal spirit beautifully.
Creative Ways to Present
Try serving your Halloween Oreo Cookie Boo Brownies on a decorative cake stand or a rustic wooden board surrounded by mini gourds and autumn leaves to create a cozy, seasonal centerpiece. Wrapping individual brownie bars in clear cellophane with a Halloween ribbon makes for fun grab-and-go treats at parties or classroom events.
Make Ahead and Storage
Storing Leftovers
Store any leftover Halloween Oreo Cookie Boo Brownies in an airtight container at room temperature for up to three days to keep them moist and chewy. For longer freshness, refrigerating preserves the texture while intensifying the chocolaty flavor.
Freezing
These brownies freeze beautifully! Wrap them tightly in plastic wrap and then foil before placing in a freezer bag to avoid freezer burn. When ready to enjoy, thaw overnight in the refrigerator. This makes it easy to prepare ahead for Halloween parties or last-minute treats.
Reheating
If you like your brownies warm, pop individual slices in the microwave for about 15 seconds or reheat in the oven at a low temperature until just warmed through. This restores their gooey texture without compromising the signature Oreo crunch on top.
FAQs
Can I use regular Oreos instead of Halloween Boo Oreos?
Absolutely! Regular Oreos work just as well and will still add that delicious chocolate crunch, though you’ll miss out on the festive spooky designs that make this treat extra special for Halloween.
How can I make sure the Oreo designs don’t break when slicing?
Letting the brownies cool completely and using a large, sharp chef’s knife to cut straight down and lift up without dragging helps preserve the Oreo decorations. Wiping the knife clean between cuts also prevents crumbs from disturbing the design.
Can I add mix-ins to the brownie batter?
Yes! Chocolate chips, nuts, or mini marshmallows can be stirred into the batter for extra texture and flavor, but keep in mind this might slightly change the baking time and texture of your brownies.
What’s the best pan size to use?
A standard 9×13-inch metal pan is perfect for this recipe, allowing for even baking and enough room to showcase plenty of Halloween Oreo Cookie Boo Brownies on top.
Can I make these brownies vegan or gluten-free?
With some ingredient swaps (vegan butter/margarine and gluten-free flour blends), you can adapt the base brownie recipe accordingly. Just be sure to check the Oreo cookies you use as some are not vegan or gluten-free.
Final Thoughts
There’s something truly magical about the combination of rich, fudgy brownies and those fun Halloween Oreo Cookie Boo Brownies perched on top — they feel like the perfect way to celebrate the season! Whether you’re baking for a party, classroom treat, or a cozy night in, this recipe promises to bring smiles and satisfy sweet cravings with every bite. So grab your apron, gather your ingredients, and let the Halloween baking fun begin!
PrintHalloween Oreo Cookie Boo Brownies Recipe

These Halloween Oreo Cookie Boo Brownies combine rich, fudgy brownies with festive Halloween Oreo cookies for a spooky treat perfect for holiday parties. The brownies are baked with whole and larger pieces of Halloween Oreos on top, giving them a delightful texture and spooky aesthetic. Serve them chilled or at room temperature for a chewy, chocolatey dessert that captures the spirit of Halloween.
- Prep Time: 15 minutes
- Cook Time: 30 minutes
- Total Time: 45 minutes
- Yield: 12 brownies (2×2 inch bars) 1x
- Category: Dessert
- Method: Baking
- Cuisine: American
- Diet: Vegetarian
Ingredients
Brownie Batter
- 1 batch Oreo Brownies by Baker by Nature (ingredients for brownie batter include cocoa powder, flour, sugar, butter, eggs, vanilla extract, baking powder, and chocolate chips)
Topping
- 12–15 Halloween Boo Oreos
Instructions
- Prepare the Pan: Line a metal baking pan with parchment paper, ensuring the paper covers the sides for easy removal.
- Make the Brownie Batter: Follow the recipe directions for making the Oreo Brownies batter as specified by Baker by Nature, mixing all ingredients until smooth and fully combined.
- Pour and Smooth: Pour the prepared brownie batter into the lined pan, then smooth out the top evenly with a spatula to create a flat baking surface.
- Add Halloween Oreos: Place the Halloween Boo Oreos on top of the batter with the spooky designs facing up. Leave some Oreos whole and break some into larger pieces to scatter across the surface.
- Bake the Brownies: Bake according to the Oreo Brownies recipe instructions, watching for a shiny, slightly cracked top and set edges to ensure they’re not overbaked.
- Cool Completely: Allow the brownies to cool fully in the pan before attempting to remove them. This helps maintain structure and makes slicing easier.
- Slice with Care: Use a large chef’s knife to cut clean lines. Press down firmly and lift the knife in one motion between slices, wiping the knife clean each time to prevent sticking.
- Serve: For best texture, try serving the brownies chilled. This enhances the chewiness and highlights the textures of the Oreos and chocolate chips.
Notes
- Do not overbake the brownies; look for a shiny, slightly cracked top with set edges to ensure perfect texture.
- Place a mix of whole and larger Oreo pieces on top to preserve some spooky designs after slicing.
- Use a large chef’s knife and a gentle pressing motion when cutting to maintain clean slices, wiping the blade between cuts.
- Allow brownies to cool completely or refrigerate before slicing to reduce sticking and improve slice quality.
- Chilling the brownies after baking enhances chewiness and flavor contrast.
Nutrition
- Serving Size: 1 brownie (2×2 inch)
- Calories: 250
- Sugar: 22g
- Sodium: 150mg
- Fat: 12g
- Saturated Fat: 5g
- Unsaturated Fat: 6g
- Trans Fat: 0g
- Carbohydrates: 33g
- Fiber: 2g
- Protein: 3g
- Cholesterol: 35mg
Keywords: Halloween brownies, Oreo brownies, spooky dessert, chocolate brownies, Halloween treats, chocolate Oreo brownies, festive brownies