Matcha Pound Cake Recipe
Introduction
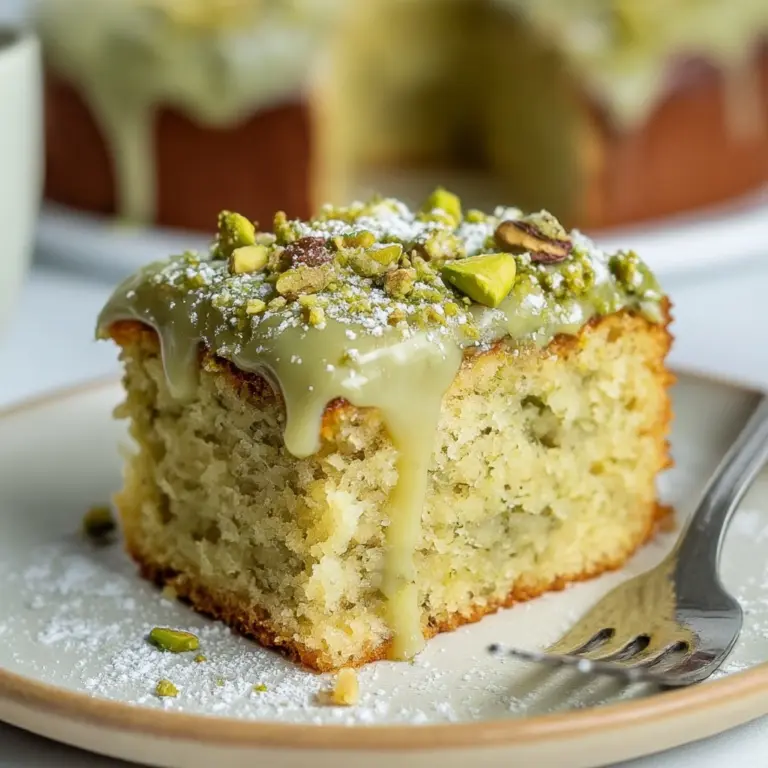
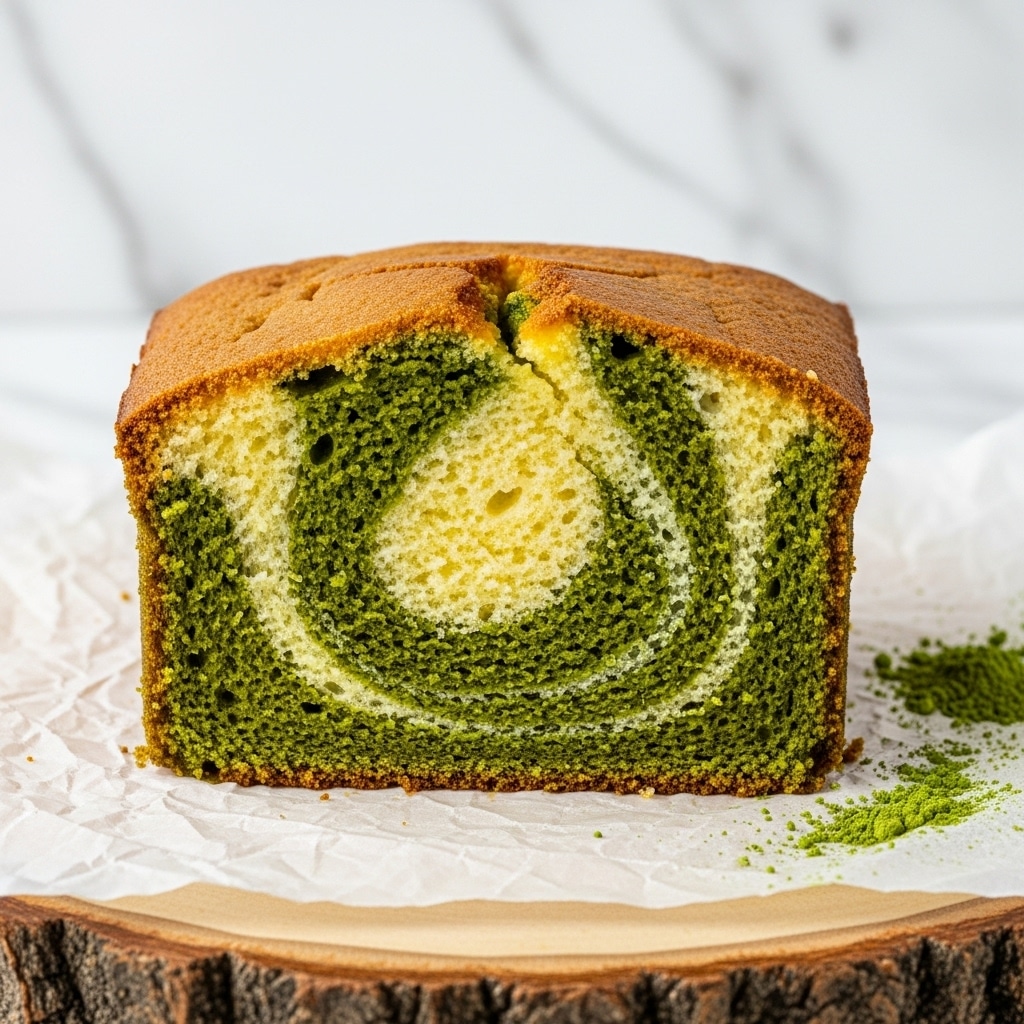
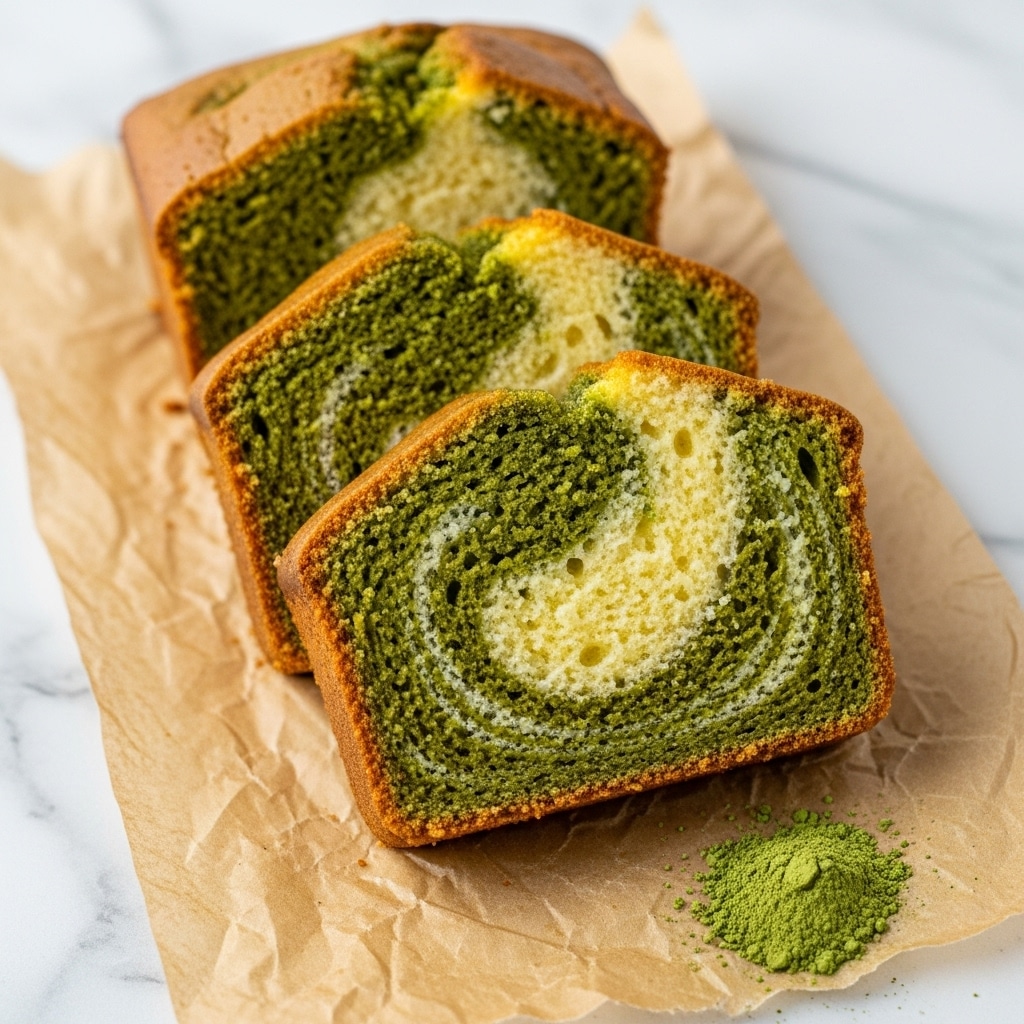
This Matcha Pound Cake offers a delightful twist on a classic favorite, blending the earthy notes of matcha with a rich, buttery vanilla base. Perfect for afternoon tea or a simple dessert, it’s both visually appealing and deliciously moist.
Ingredients
- 14 tbsp unsalted butter, room temperature
- 1 cup granulated sugar
- ½ tsp salt
- ½ tsp baking powder
- 3 eggs, room temperature
- 1 egg yolk, room temperature
- ½ cup sour cream, room temperature
- 1 tsp vanilla extract
- 1 ½ cups all-purpose flour
- 1 tbsp matcha powder
- 1 tbsp water
Instructions
- Step 1: Preheat your oven to 350°F (177°C) and grease a loaf pan with butter or oil.
- Step 2: In a large mixing bowl or stand mixer, cream together the butter, sugar, salt, and baking powder until light and fluffy, scraping down the bowl occasionally.
- Step 3: Add eggs and egg yolk one at a time, mixing well and scraping the sides after each addition.
- Step 4: In a separate bowl, combine sour cream and vanilla extract. Add half of this mixture to the batter and mix until combined.
- Step 5: Add half of the flour to the batter and mix until combined. Repeat by adding the remaining sour cream mixture followed by the remaining flour, mixing to form a soft batter.
- Step 6: Finish mixing the batter gently with a spatula about 5-6 times to deflate some bubbles without overmixing.
- Step 7: Divide the batter evenly into two bowls. Sift matcha powder into one bowl, add water, and mix until the batter turns a uniform green color.
- Step 8: Spoon half of the vanilla batter into the bottom of the loaf pan, leaving spaces for the matcha batter. Then add half of the matcha batter into these spaces. Use a spatula or knife to gently swirl the two batters together.
- Step 9: Repeat the swirling process with the remaining vanilla and matcha batters.
- Step 10: Tap the loaf pan on a flat surface to remove air bubbles and distribute the batter evenly.
- Step 11: Wet a knife and score the batter lengthwise down the middle to encourage a nice center crack during baking.
- Step 12: Bake for 60-70 minutes or until a toothpick inserted into the center comes out clean and the top is golden brown.
- Step 13: Let the cake rest in the pan for 10 minutes before removing to cool completely.
Tips & Variations
- Use sifted matcha powder to avoid lumps and get a smooth green color.
- For extra moisture, you can replace half the sour cream with Greek yogurt.
- Try adding a teaspoon of lemon zest to the vanilla batter for a bright contrast to the matcha flavor.
- If you prefer a stronger matcha taste, increase the matcha powder to 1 ½ tablespoons.
Storage
Store the pound cake in an airtight container at room temperature for up to 3 days. For longer storage, wrap it tightly and refrigerate for up to one week. To enjoy the best texture, reheat slices gently in a microwave for 10-15 seconds or warm in an oven at 300°F (150°C) for 5 minutes.
How to Serve
Serve this delicious recipe with your favorite sides.
FAQs
Can I use cake flour instead of all-purpose flour?
Yes, you can substitute cake flour for a lighter, more tender crumb, but reduce the quantity slightly as cake flour is less dense.
What can I do if I don’t have sour cream?
You can substitute sour cream with an equal amount of plain Greek yogurt or buttermilk to maintain the moist texture and slight tang.
PrintMatcha Pound Cake Recipe

This Matcha Pound Cake combines the rich, buttery flavor of a classic pound cake with the earthy, vibrant taste of matcha green tea. The cake features a beautiful swirl of matcha and vanilla batter, baked to a golden brown perfection with a moist, tender crumb. Perfect for tea time or dessert, this loaf cake is a delightful fusion of traditional and Japanese flavors.
- Prep Time: 20 minutes
- Cook Time: 65 minutes
- Total Time: 1 hour 25 minutes
- Yield: 1 loaf cake (8 slices) 1x
- Category: Dessert
- Method: Baking
- Cuisine: Japanese American Fusion
- Diet: Vegetarian
Ingredients
Dry Ingredients
- 1 ½ cups all purpose flour
- ½ tsp salt
- ½ tsp baking powder
- 1 tbsp matcha powder
Wet Ingredients
- 14 tbsp unsalted butter, room temperature
- 1 cup granulated sugar
- 3 eggs, room temperature
- 1 egg yolk, room temperature
- ½ cup sour cream, room temperature
- 1 tsp vanilla extract
- 1 tbsp water
Instructions
- Preheat and Prepare: Preheat your oven to 350°F (177°C) and grease a loaf pan with butter or oil to prevent sticking.
- Cream Butter and Sugar: In a large mixing bowl or stand mixer, cream together the unsalted butter, granulated sugar, salt, and baking powder until light and fluffy, scraping down the sides periodically to ensure even mixing.
- Add Eggs: Add the eggs and egg yolk one at a time, mixing thoroughly after each addition and scraping down the bowl to combine fully.
- Add Sour Cream and Vanilla: Mix the sour cream and vanilla extract in a separate bowl, then add half of this mixture to the batter and blend until combined.
- Add Flour: Add half of the all-purpose flour to the batter and mix until incorporated. Then repeat by adding the remaining sour cream mixture followed by the remaining flour, mixing to a soft batter consistency.
- Finish Mixing: Use a spatula to gently fold the batter about 5-6 times to finish mixing and reduce air bubbles without overmixing.
- Prepare Matcha Batter: Spoon half of the batter into another bowl. Sift the matcha powder over this portion and add the water, mixing until the batter is a uniform green color.
- Layer and Swirl: Spoon half of the vanilla batter into the bottom of the loaf pan in dollops, leaving spaces for the matcha batter. Add half of the matcha batter into those spaces, then use an offset spatula or knife to swirl the two batters together. Repeat with the remaining batters.
- Settle Batter: Tap the loaf pan on a flat surface to remove air bubbles and level the batter throughout the pan.
- Score Batter: Wet a knife and score the batter lengthwise down the center to encourage a clean center crack while baking.
- Bake: Bake the pound cake in the preheated oven for 60-70 minutes, or until a toothpick inserted in the center comes out clean and the top is golden brown.
- Cool: Allow the cake to rest in the pan for 10 minutes before removing to a wire rack to cool completely.
Notes
- Ensure all ingredients are at room temperature for best texture and mixing.
- Sifting the matcha powder prevents lumps and helps achieve an even color.
- Scoring the batter helps create an attractive crack and even baking.
- You can test doneness by inserting a toothpick into the center; it should come out clean or with a few moist crumbs.
- Store the cake wrapped in plastic wrap at room temperature for up to 3 days, or refrigerate for up to a week.
Keywords: Matcha Pound Cake, Green Tea Cake, Swirled Pound Cake, Matcha Dessert, Loaf Cake, Tea Time Cake